
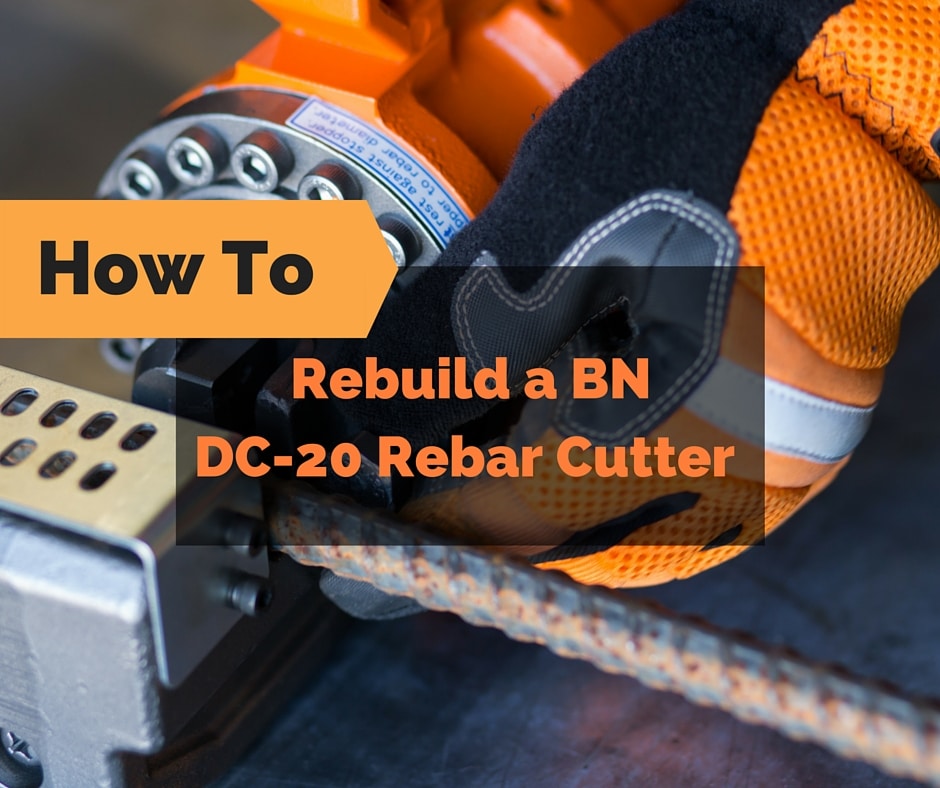
If you have the best tools, it’s important to know how to care for them properly which is why we’re breaking down how to rebuild your DC-20 Rebar cutter. The DC-20WH is a portable tool that’s intended for effortless heavy-duty applications on vertical and horizontal rebar cutting applications. This portable rebar tool weighs 25.5 pounds and can cut up to ¾ inch #6 rebar Grade 60. Cutting speed is 3 seconds with the pressure of 15 tons, and the tool is 115 volt.
Cleaning the Parts
Before you begin to rebuild the rebar cutter, thoroughly clean all parts in mineral spirits. Then lock the cylinder in place using a vice. Next, you’ll want to prepare the delivery valves that go into the port by polishing the surface up with a special bit. To begin, place a dollop of the same hydraulic oil used for the tool on a clean surface. Dip the bit into the oil and place into the port two to three times to lubricate. Then, take your driver set using no torque at low speed and insert into the bit and rotate. Do that for all three ports, then clean out each port with mineral spirits and blow dry with compressed air.
Ram Fitting 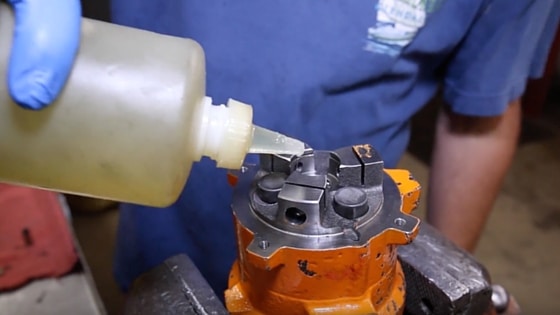
Start by placing a bit of oil in the bearing, take a Ram 1 C-1327 plus or minus zero and insert into the port, the ram needs to have some tolerance, but not too loose or too tight. If the ram is too tight or too loose, you’ll often feel it get hung up. This is an indication that you need a different size. Be aware that each port needs to be individually fitted as some might be slightly larger or smaller than the other. Now remove any excess oil and make sure the magnets are clean. By the way, your rebuild kit comes with all the gaskets and bearings you need. Put the new gasket in place with the white lines facing up, then place the springs into each of the ports.
Next, insert the new delivery valves making sure that the nipple is facing outward. Grab a pump seal with your spring guide in place, and this is how you grab it, with your thumb on the back and your fingertip on the spring holding it in place. Have a small flat-head screwdriver near you. With one finger, hold the ram in place while the other pushes toward the delivery valve. Take the flat head screwdriver and gently push on the edges of the seal until it is completely in. You can then push it flush. Since this component is spring loaded, this is where the ram set ring helps out and holds it in place while you move onto the next port. Once completed, rotate to put pressure on both valves. Now lock in the ram set ring and double check to make sure that all of the rams are moving freely. Finally for this step, install the needle bearing. Simply push back one of the rams and pop into place. Now, place the top washer and install the snap ring. Double check to make sure the snap ring is secure and in the groove.
Removing and Replacing the Bearing
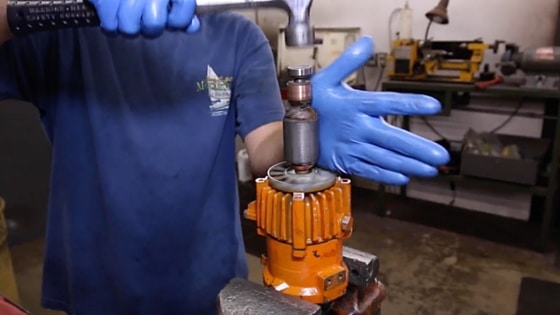
To remove and replace the bearing on the armature you will need a puller tool. Make sure there are no cracks on the fan wheel and inspect the shaft and make sure there are no significant score marks. For light scratches, it is advised to buff them out. Now, remove the bearing on the opposite end of the armature, put a dust seal washer in place, and then install the new armature bearing. All you have to do is simply tap into place with a hammer. Carbon fiber from the brushes can often gunk up this area, so be sure to clean out the grooves. Sometimes you might see a spark while cleaning. This is okay. It’s just buildup of the carbon. Finish this step with a piece of emery cloth as one of the final processes in cleaning the armature.
Installing the Oil Seal
Put a touch of oil on your finger and lubricate the seal, then lay the seal into position taking your two thumbs and pressing down evenly. Make sure you press it all the way down, otherwise your new bearing will cut into it and will likely begin leaking. Now you’re ready to install the new bearing which requires a hydraulic press. If you happen to have forgotten your gasket, you can put it on at this time just make sure it lines up where it should and that the white lines are facing up. Now you can put the pump case on and remove the ram set ring. Be sure to maintain some pressure and just push it into place.
Installing the Armature, Motor Housing and Brushes
 When installing the armature, start by placing a bit of oil in the hole and on the cam of the armature. Place the armature into the hole and take a metal hammer and tap it into place while also spinning to ensure that it goes in straight. Once you hear that blunt sound, you know that it’s all the way in. To install the motor housing simply slip it over and install the bolts. Be sure to snug down the brush set screws, they have a tendency to vibrate loose and if they do, a connection will be lost and the unit will not operate.
When installing the new brushes, you can see the old brush on the left still has some life in it, but we’re going to go ahead and replace it with a new one on the right so it won’t have to be replaced anytime soon just insert the new brush in the hole and screw in the cap. With the brushes installed, we’ll now put the unit aside for a moment and work on the front housing.
To install the new airbag take the bolt and screw it in and simply pull it free. Now take the new airbag, squeeze and insert, and make sure it is seated properly by pulling up and making sure it’s even, then remove the bolt. Now slide the new airbag into the chamber making sure you push it all the way in. Before screwing the front bolt into the air bag, it’s very important to inspect and make sure light is coming through it. If you don’t see any, you will need to replace this bolt or drill it out. Now place one finger on the back of the unit to prevent the airbag from coming out as you insert and rotate the screw.
Installing the Piston
Each piston comes with a keyway so put that into place, then you’ll want to dry fit the piston to make sure there are no hang-ups and that it retracts smoothly. Sometimes people will cut something beyond the tool’s limitations and it will swell the end of the piston, causing it to hang up or not glide smoothly. If this is the case and it’s not too severe, you can slightly remove material using a belt sander. However, be careful because if you sand too much, the unit will leak and the piston will need to be replaced. To make this piston perform at optimal levels, we’ll take it over to the buffing wheel to take out any light scratches.
To ensure the spring is all the way down on the return valve, you can take a large pair of pliers and squeeze down. To install the front seal, place a dab of oil on your finger and lubricate. Make sure the groove is facing you. Push it all the way in assuring it is completely sealed. Now put the other cylinder gasket in place and assure the side with the space between the holes is on the left side. Put the big spring in place and then insert the piston and push to make sure everything is smooth. You can secure the piston in place with a large c-clamp then place two Allen keys in the block holes to prevent the piston from retracting and then remove the c-clamp. Now remove the old seal with a flathead screwdriver moving back and forth until it’s free from the piston. Place a bit of oil on the new seal. Before installing, make sure the flat part is seated against the piston and the groove part is facing you. Start at the bottom and apply pressure as you move your thumbs toward the top, and it will snap right into place.
Installing the Cylinder and Cutting Blocks 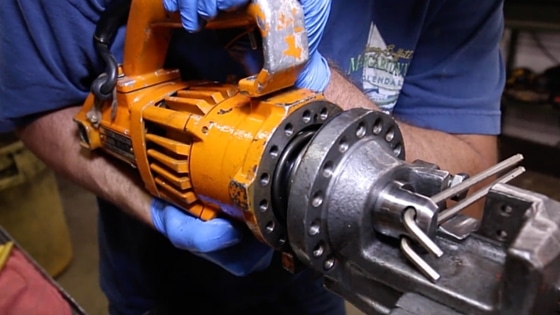
To install the cylinder lace a bit of oil on the new seal and some in the cylinder. When installing the cylinder, hold it just like this with a slight downward tilt, and with a little pressure, it should go right in. Now you can begin installing all of the cylinder bolts, then finish with the driver and fully tighten, there are 14 total bolts, 12 on the front and 2 in the back. Now you can remove the Allen keys from the piston and then secure the handle and then install the fin on the back of the unit.
When installing the cutting blocks to the housing, you can start with the cutting guard and left cutting block, then install the other one. Make sure you get these extremely tight. A loose block will likely chip and could cause damage to the unit.
Bleeding the Tool
Start by tilting the unit just a bit, then remove the 17-millimeter oil bolt from the unit. Your rebuild kit comes with the correct oil. Always make sure to use the recommended type, which is indicated at the end of this video. Start filling the unit until it won’t take anymore. Once it’s topped off, place your finger over the hole. Now throttle the tool until the piston stops moving. Now continue to add more oil. Repeat the process of throttling the tool. The piston may want to retract, so keep your finger near the hole. Add more oil and throttle once again until the piston retracts.
Now you want to let air escape until oil starts to seep out, then throttle to extend the piston just before it retracts. Add oil once again, then retract the piston. Repeat this process two to three times and top off with oil and replace the bolt.
Testing the Rebar Cutter
The final step is to test the rebar cutter to make sure it’s operating properly. Begin by warming the tool for 20 to 30 seconds to warm up the oil. This is important to do each time you use the tool for the first time after it’s been setting for a while. Make three to four cuts just to be sure. Remember to adjust the stopper bolt so the rebar is straight and not at an angle. This completes the rebuild of the DC 20 rebar cutter by BN products USA.
For more information on the DC-20 Rebar Cutter, contact BN Products or view our professional rebar tools for more information.