
To be the best person on the job site, you not only need to bring the best tools but you also want tools that are easy to tear down when the job is complete. The DC-20WH is a portable tool that’s intended for effortless heavy-duty applications on vertical and horizontal rebar cutting applications. This portable rebar tool weighs 25.5 pounds and can cut up to ¾ inch #6 rebar Grade 60. Cutting speed is 3 seconds with the pressure of 15 tons, and the tool is 115 volt. Below we’re breaking down how to tear down the DC-20WH rebar cutter so that you can keep your tool in tip-top shape!
Removing the Screws, Brush Caps, Motor Housing and Bolts
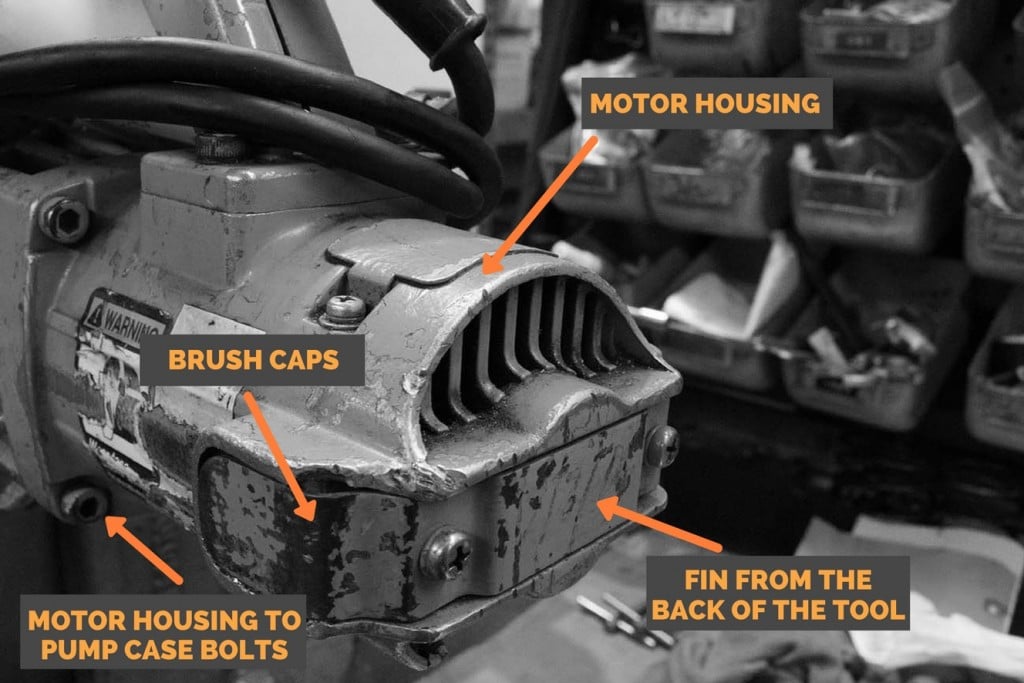
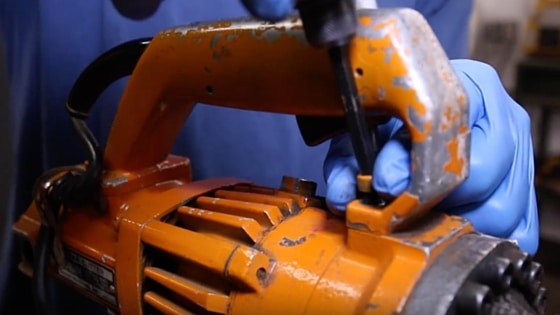
First, you will begin by removing the two Phillips head screws to release the fin from the back of the unit and gently pry free. Next, remove the brush caps with a flat head screwdriver, then simply remove the spring loaded brushes. Once that is complete remove the motor housing, start by completely removing the front two bolts then just back off the rear two so the handle is loose.
Now, remove the four bolts that secure the motor housing to the pump case. Make sure that you have something to catch the oil as the unit will begin to discharge. To release the motor housing, grab the handle and with a flat head screwdriver, pry it from the pump case. Be cautious not to damage the fan, then the unit should just slide off. Make sure to inspect the armature for damage to ensure that there are no large gaps. Also, check the plastic fan for cracks.
Separating the Pump Case from the Cylinder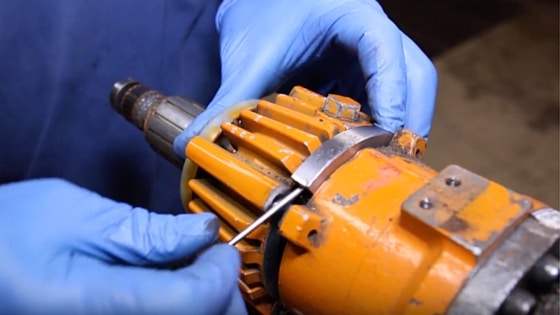
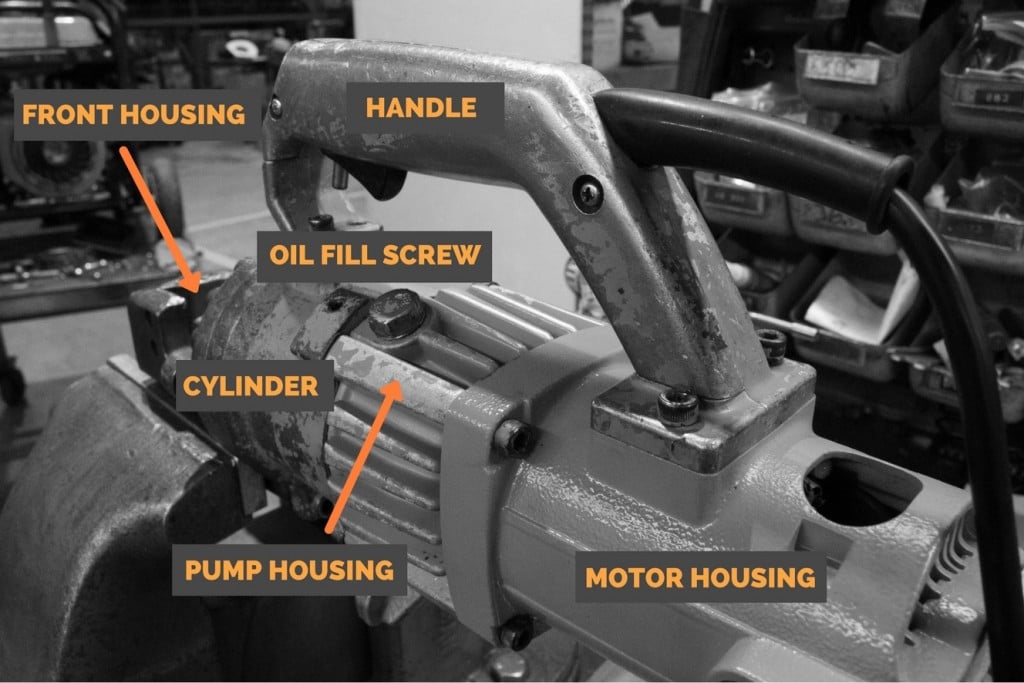
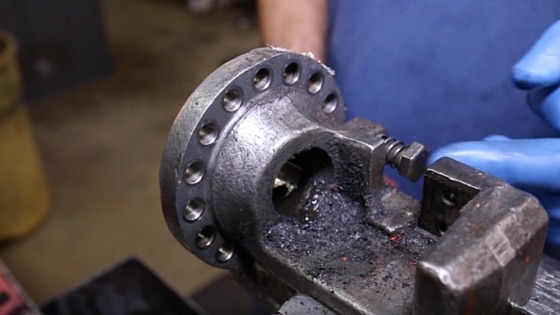
Next you will work on separating the pump case from the cylinder. It’s very helpful to have this Ramset ring for this procedure. You can purchase this tool from us. The part number is 1C0232. This will work for the DC-20WH and the XH. We also have other size Ramset rings for other tools we sell. With the proper Ramset ring at the ready, take a metal hammer and tap on the oil bolt. Continue to do so until you see the black pump head seals. Go far enough to be able to insert your Ramset ring.
The unit is spring loaded, so be sure to keep pressure on the pump case as you rotate the first half of the Ramset ring. Slip the other half in and secure with the supplied bolt clamps. Make sure the clamps are tight, and then you can simply release the pump from the unit. Remove the armature from the pump case by using a rubber or plastic mallet. Inspect the camshaft for damage. Sometimes a needle bearing inside the cylinder will break, causing damage to the cam.
Separating the Cylinder from the Front Housing
This is the first phase in separating the cylinder from the front housing. It’s crucial that the airtight bag at the front of the unit stays clear of debris. Often, mortar or dirt will get into that area. If not kept clean, it could cause damage to the unit. Now, remove the cutting blocks, and always replace if they are cracked or heavily worn. There are eight cutting sides to the cutting blocks. If they get worn, simply rotate and/or flip.
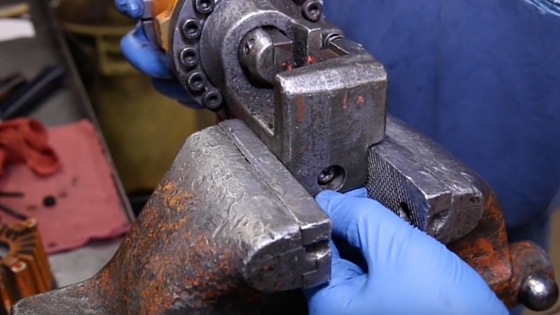
Next, begin removing all the bolts from the front housing. Your air or power tool may not have enough torque, so you can use a six millimeter Allen wrench with a cheater bar for extra leverage. Once the bolts are loose you can use a power driver to finish removing. Remove all of the bolts except for the last one. Make sure that the piston is in good condition. You can even polish it up to make sure there are no burs or hang ups when the piston retracts. When removing the final bolt, be sure to put your hand on the back of the unit so it doesn’t drop to the floor as it’s spring loaded.
When the final bolt is removed, slowly separate the two pieces. Be advised that sometimes the piston will stay inside the housing. Just be cautious that it doesn’t fall to the floor. When removing the piston, be sure to take it out straight so that it does not jam up and cause problems. Be sure to closely inspect the piston for any hairline fractures. It’s now time to inspect the cylinder for any damage. It’s worth noting that if the correct hydraulic oil has not been used it can break down the seal and over time it will disintegrate causing metal to rub on metal.
Disassembling the Cylinder
First, start by removing the snap ring and washer, the needle bearing, and then the Ramset ring. Now, remove the three Rams, springs and delivery valves. By the way, all of these parts come with our rebuild kit. After you’ve removed the components out of the cylinder, you’ll want to inspect the bearing. If it doesn’t want to easily pop out and is free spinning, we recommend leaving it alone.
Remove the gasket and replace the stopper bolt if it looks worn. Next, you’ll want to remove the airbag. Start by taking a large Phillips head screwdriver and give it a tap to release any debris that may have gotten into the grooves. Loosen and then take a pair of needle-nose pliers and pull out the bag from the unit.
To remove the inner seal, simply take a flathead screwdriver and from the rear of the unit gently tap to get underneath the seal. Then, lift up and remove. Finally, pivot the unit and allow any remaining oil to drain.
For more information on the DC-20 Rebar Cutter, contact BN Products or view our professional rebar tools for more information.